Tree Service Company

Oak Wilt Disease - Gabris Landscaping Springfield MO

Oak Wilt

Click Here To Download Oak Wilt

Oak Wilt

Tree species affected: Oaks, especially the red oak group

Concerns:Leaf discoloration and wilt, tree defoliation and death

Description: Oak Wilt is a lethal disease of oaks, especially species in the red oak group. The fungus responsible, Ceratocystis fagacearum, invades the tree, causing it to die. In Missouri, the oak wilt fungus is spread primarily when sap-feeding beetles carry oak wilt spores to fresh wounds during the early part of the growing season. Once established in a tree, oak wilt can move though root grafts connecting nearby oaks.

Symptoms and Signs: The first symptom of oak wilt in red oaks is usually browning and wilting of leaves in the upper crown in early summer (Fig. 1). White oaks often exhibit scattered branches with wilting leaves in the crown (Fig. 2). Wilted leaves display olive drab or light tan to bronze tissue starting at the margins and progressing toward the leaf base (Fig. 3). Brown or black streaking may be seen under the bark of wilted branches in both groups (Fig. 4). Rapid defoliation of red oaks can occur within two to six weeks of initial infection, and death occurs within a year. White oaks may take years to die from the infection. Under ideal conditions, oak wilt fungal mats form under the bark of dead red oaks the spring following tree death (Fig. 5), causing cracks in the bark and emitting a sweet, fermenting odor, attracting sap-feeding insects that spread the fungus. Squirrels may chew through the bark to expose these areas.

Jerral Johnson, Texas Agricultural Extension Service, 1995Fire wood Soil Line Plastic 6April 2013 Recommendation: Once a red oak tree displays extensive crown wilt symptoms, the tree will die. White oaks may survive the disease for several years with careful pruning of infected branches and good tree care. Accurate diagnosis of oak wilt is essential for appropriate treatments as other disorders can look similar. Contact your local MDC forester or see www.npdn.orgfor information on labs that can confirm oak wilt.

Two treatments can be considered to protect healthy, high-value red oak trees near infected trees: a professional arborist can inject fungicide before the trees show symptoms, or grafted roots can be killed through mechanical trenching or chemical applications. Root grafting is less common in Missouri than in some states, and is only likely to occur when oaks of the same species grow in close proximity. Fungicide application is costly, may need to be repeated every 1-3 years, and where root grafting occurs, is most effective when combined with graft disruption.

Counties confirmed with oak wilt in the last decade. The disease could be present in other areas.

Remove diseased trees after they have completely died but before the following spring when fungal mat development is possible. Removal of symptomatic trees prior to death can hasten movement of the fungus to adjacent oaks if root grafts are not first disrupted. Unseasoned firewood from infected trees can spread the disease; however, it is safe to burn, and burning destroys the fungus. Cover potentially infected firewood with 4-mil clear plastic and bury the edges with soil until the end of the following summer (Fig. 6). Landowners with oak wilt in woodlots or forests should consult their local MDC forester for appropriate treatment options.

Prevention: Avoid pruning or damaging oaks from mid-March through June. Oaks become more susceptible to the disease a couple weeks before bud break occurs in the spring. Immediately use commercial tree wound dressings, available from garden centers, on fresh wounds or storm damaged areas during the spring infection period (Fig. 7). Firewood movement should only occur locally to prevent movement of oak wilt and other invasive forest pests to new areas.

Read more...
Pine bark beetles

Pine bark beetles

Click Here To Download Pine bark beetles

Pine bark beetles

DESCRIPTION

There are numerous species of Ips Engraver and Dendroctonus, Bark Beetles, that infest conifers throughout North America. Adults tunnel through the bark, mate and lay eggs in the phloem (inner bark). The larvae develop in the phloem and cambial region; pupal development is completed in the inner or outer bark. Adults develop from pupae and emerge by boring out through the bark. Multiple generations a year are possible

SYMPTOMS

Symptoms of infestation include: pitch tubes, reddish boring dust, adult exit holes, and yellowing foliage. The beetles commonly attack drought stressed trees. High number of attacks to trees are possible, which can result in extensive vascular injury and ultimately, tree death.

TRE ATMENT

TREE-äge ® Insecticide (containing 4% Emamect in  Benzoate ) is the recommended treatment for Bark Beetles including Ips Engraver Beetles, Mountain Pine Beetles, Southern Pine Beetles, Spruce Beetles and Western Pine Beetles. TREE -äge provides 2 years of control for labeled Bark Beetles. The TREE I.V. system is recommended for treating Bark Beetles due to the nature of the host trees.

Dosages are based on the Diameter (in inches) of the tree at Breast Height (DBH”). Resinous Conifers: In resinous conifers, such as pine and spruce, start the injection immediately after drilling into the sapwood. A prolonged delay may reduce uptake on account of resin flow into the opening.

WHEN TO TREAT

Effective injection treatment is favored by a full canopy (i.e., leaves) and a healthy vascular system. Once these tissues are compromised by insect damage (adult and larval galleries) an effective and uniform application of TREE-äge may be difficult to achieve and subsequent control may be poor. Optimally, treatment should be made preventively at least 2 to 3 weeks before Bark Beetles historically infest the host tree.

TREE-äge may also be effective as a remedial treatment against some pests, such as those with slower development or if multiple life stages are susceptible to TREE-äge

WHAT TO EXPECT AFTER TREATMENT

Research studies using TREE-äge (containing 4% Emamectin Benzoate) have demonstrated effective results against conifer bark beetles, depending on the pest species targeted. You can expect TREE-äge to be systemically distributed throughout the tree and provide protection from Bark Beetle pests for up to 2 years.

REFERENCES

1 Effectiveness of Two Systemic Insecticides for Protecting Western Conifers from Mortality Due to Bark Beetle Attack: Don M. Grosman, Christopher J. Fettig, Carl L. Jorgensen, and A. Steven Munson, Western Journal of Applied Forestry 25(4) 2010

2 Efficacy of Systemic Insecticides for Potection of Loblolly Pine Against Southern Pine Beetles (Coleoptera: Cuculionidae: Scolytinae) and Wood Borers (Coleoptera: Cerambycidae) Donald M. Grosman and William W. Upton Journal of Econ. Entomol. 99 (1): 94-101 (2006)

Read more...
Chlorosis on Trees

Chlorosis on Trees

Click Here To Download Chlorosis on Trees

Chlorosis on Trees

DESCRIPTION

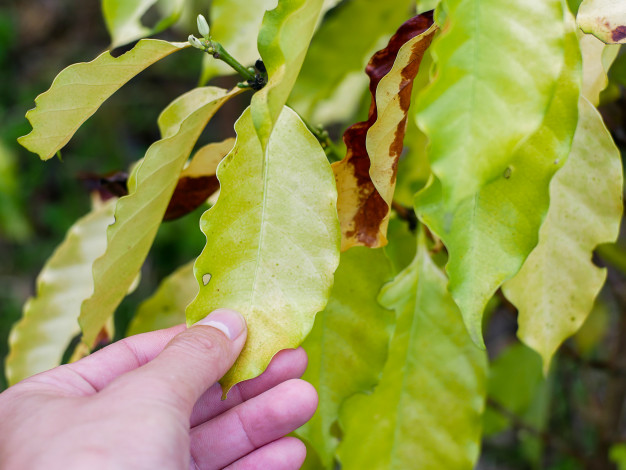
Iron or manganese chlorosis (interveinal  chlorosis) describes a condition in which a tree’s foliage loses its healthy green color and fades to a pale green or yellow hue. This condition if allowed to progress will cause slow growth, leaf loss and eventually tree death. Chlorosis is often caused by deficiencies of the micro-elements iron and manganese, and is particularly prevalent in oak. In alkaline soils, iron and manganese become insoluble and unavailable to the tree. Trees growing in poorly drained soils are also susceptible to iron chlorosis

SYMPTOMS

The primary symptom is the fading of the leaf color from green to increasingly paler shades of green and, when extreme, to an almost yellow tone.

TRE ATMENT

Arborjet recommends a two-pronged approach to treating foliar chlorosis.

1)Trunk InjectionBy injecting minerals which are deficient in the tree directly into the xylem tissue, these minerals available to the tree immediately; thus, it is the fastest way to alleviate symptoms of chlorosis and improve the health of the tree. In oaks and birches, use the QUIK-jet to apply MIN-jet Iron which is specially formulated for iron deficiency. By rapidly providing the minerals the tree needs, it is able to respond rapidly and generally will have darker, healthier leaves within days or weeks of application.

2) Soil ApplicationArborjet recommends a supplemental follow up application of ROOT-jet Iron, which can be applied as a soil drench, soil injection or foliar spray. ROOT-jet Iron is formulated to help acidify the soil and provide additional nutrients to aid recovery and long term health of the tree. The addition of high quality organic matter to improve soil CEC and to buffer pH is likewise recommended.


IRON CHLOROSIS WHEN TO TREAT

Generally, the best seasons for injection are fall and spring, as uptake occurs when trees are transpiring. The environmental conditions that favor uptake are adequate soil moisture and relatively high humidity. Soil temperature should be above 40°F for trunk injection. Hot weather or dry soil conditions will result in a reduced rate of uptake, so trees should be watered if applications are made when soil is extremely dry. If treating trees in the summer, inject in the morning for the quickest uptake. Tree health will affect treatment efficacy, so assess tree health prior to treating. For example, a declining tree (>50% canopy dieback) is a poor candidate for treatment.

For foliar chlorosis, the best time to treat is in the fall, following leaf coloration for foliage responses in the following growing season. When treating in the early spring or summer, use the lowest (micro-injection) label rates. Make applications prior to bud break in spring or, alternatively following leaf maturation (June 15). Always use the lowest label rates when treating birch trees.

WHAT TO EXPECT AFTER TREATMENT

Recovery will be proportional to the level of the severity of chlorosis at the time of treatment. Response to treatment can be very rapid; you can expect to see noticeable greening and improved vitality within the growing season and often within weeks of application. Tree responses vary with soil conditions. Calcitic soils with little organic matter require comprehensive approach to treatment, including soil amendments. At Arborjet, we stress the importance of being proactive. This means that it is imperative that you treat the disease, not only the symptoms. This is why we recommend the addition of ROOT-jet Iron to the soil in order to prevent the recurrence of iron chlorosis symptoms. With the proper assessment and amendment of soil conditions, the tree may not need to be injected again for several years.


Read more...
Types of Landscape Mulch Installation Springfield MO

Root Ball Myths

Click Here To Download Root Ball Myths

Linda Chalker-Scott, Ph.D., Extension Horticulturist and Associate Professor,
Puyallup Research and Extension Center, Washington State University

The Myth of Collapsing Root Balls
“Balled and burlapped root balls must be left intact during transplanting”

The Myth

While shopping for trees at my favorite nursery, we recently overheard another customer ask a staff person about installing her newly purchased B&B tree. “When I plant my tree I should take off the burlap and twine, right?” she asked. “Oh no,” exclaimed the staffer. “You don’t want to disturb the root ball. Just peel the burlap back from the trunk and leave the rest intact. Otherwise, the root ball will collapse and the tree will die.”

At first glance, this appears to be reasonable advice. Balled and burlapped, or B&B trees, are much heavier than containerized plants and one can visualize the root ball collapsing and crushing the root system. The weight of the root ball also helps stabilize the tree and prevent tilting or falling. Finally, the root ball soil contains beneficial microbes and other soil organisms that can help ease transplant shock to the root system. With these benefits in mind, why would you consider doing anything differently?

The Reality

Many nurseries will not guarantee their plant materials if the customer disturbs the root ball, so customers are loathe to do anything that might negate this policy. This is unfortunate, as disturbing the root ball is exactly what you want to do to maximize survival of your newly transplanted tree.

A previous column discussed how to transplant containerized plant materials properly, and some of the same issues apply to B&B trees as well. The most important reason to disturb the root ball of a balled and burlapped tree is to inspect the root system. The circling, girdling, kinked, and hooked root systems often found in containerized plants occur frequently with B&B materials, too. Nearly every B&B tree I have purchased and installed, either in my own landscape or as part of a project, has had serious root defects. By removing the heavy clay one can find and correct many of these defects. Without corrective pruning these defects will significantly lower the life span of your tree. Remember, root pruning stimulates the growth and development of new roots that will enhance tree establishment in the landscape.

A second reason to break up the root ball is to remove the clay soil that makes the tree so heavy in the first place. Most B&B trees are grown in a soil with clay characteristics so that when the tree is dug the root ball it will hold its shape: sandy soil will simply fall away from the roots. The clay soil not only maintains its shape but also retains water, so that B&B materials are usually more stable in terms of optimal water conditions during the time they are out of the ground. When the tree is planted into the landscape, however, the clay character of the soil is often different than that of the surrounding native soil. Differences between soil textures will impede water movement and therefore inhibit root establishment.

A final reason to remove the bagging materials and root ball soil is that many of the B&B specimens at the nursery have been burlapped too high during field digging and bagging. Burlap and soil that covers the trunk above the root crown will lead to trunk disease and death. In every nursery I’ve visited I have found more than one tree trunk literally rotting in the bag. Before purchasing any B&B stock you should ensure that a healthy trunk lives beneath the burlap.

 The best practice for transplanting B&B trees is relatively straight-forward. (The rationale for many of the practices listed below are detailed in previous B&B columns):
1) Remove all wire baskets, twine, and burlap from the root ball. Working on top of a tarp will allow you to transport the root ball remnants elsewhere.
2) Remove all clay from the root ball. This can be done most easily by using a water bath or a hose. Use your fingers to work out clumps of clay from between the roots.
3) Look for and prune out defects in your freshly denuded roots. Be sure to keep the roots moist during this procedure and work in the shade if possible.
4) Dig the planting hole to be only as deep as the root system and at least twice as wide. The hole will resemble a shallow bowl.
5) Form a soil mound in the center of the hole to support the root crown of the tree, and arrange the roots radially.
6) Backfill with native soil; do not use any type of soil amendment.
7) Water in well, preferably using the water from step 2 which will contain nutrients and microbes. Do not step on the root zone, but gently firm using your hands. Add an appropriate fertilizer (i.e. primarily nitrogen and little or no phosphorus)
8) Mulch the entire planting region with at least 4” of organic mulch, keeping a buffer between the trunk and the mulch to prevent disease.
9) Stake your tree low and loose with 3 stakes for no longer than one year after planting.
10) Keep your tree well watered during the first year of establishment. You may have removed a good portion of the root system and its ability to take up water and nutrients will be temporarily impaired. Do not succumb to the temptation to crown prune or add expensive, but pointless, transplant supplements.
This method is radically different from historically accepted practices. Yet recent and ongoing research demonstrates that bare-rooting B&B trees leads to substantial increases in tree establishment and survival. Investing the time to prepare and install trees properly will pay future dividends of reduced maintenance and mortality for the lifetime of your landscape.
The Bottom Line
    • Balled and burlapped plant materials usually contain soil significantly different than that of the transplant site.
    • Differences in soil texture will impede both water movement and root establishment.
    • Root defects can only be found and corrected if root ball soil is removed.
    • Proper root preparation combined with best practices for installation will greatly improve tree establishment and survival in any landscape.

For more information, please visit Dr. Chalker-Scott’s web page at http://www.theinformedgardener.com

Read more...

Tree Watering Practices

Click Here To Download Tree Watering Practices

Tree Watering Practices

How to Water Your New Trees

There are many exceptions to the following guidelines. Species-specific research is encouraged for customers interested in the proper maintenance of their trees.

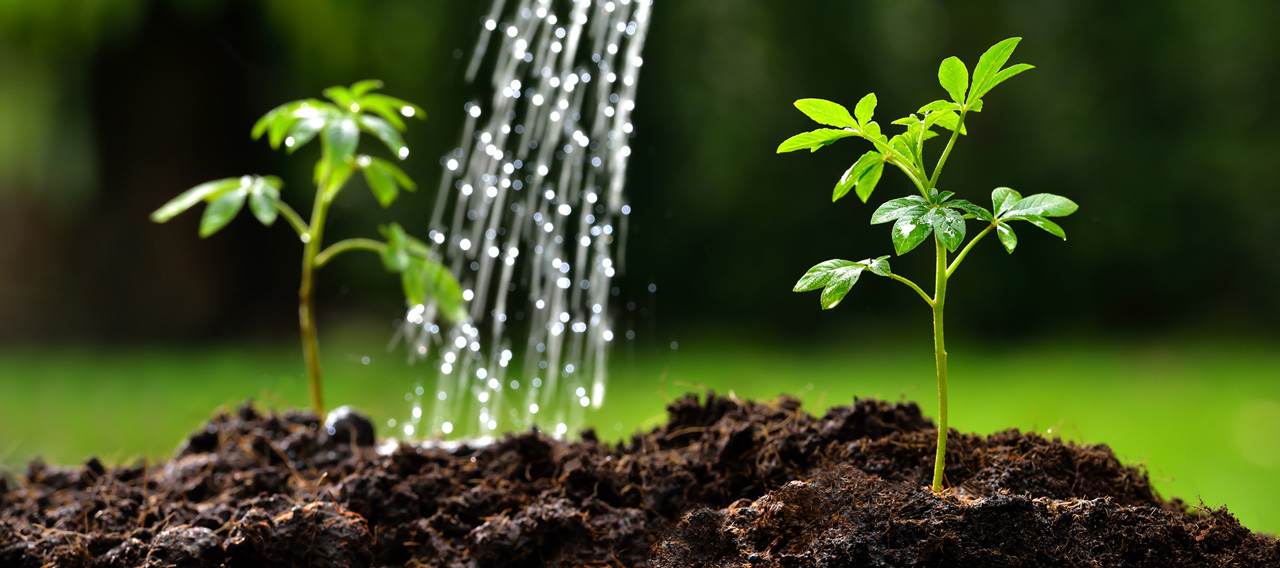
Trees prefer a larger volume of water, provided a little less frequently, relative to smaller plants. The key to establishment is to keep the soil around the root system moist. The root system is generally 12 to 18 inches deep on most trees. A slower deeper watering is more effective at reaching 12 to 18 inches deep.

Over watering can push all of the oxygen out of the soil and actually choke a plant to death faster than underwatering will kill the plant of dehydration. Be sure water is draining from your plant so it isn’t sitting in a puddle of water for an extended period of time after watering. Poorly draining soils will require much less water than outlined below. Touching the ground and feeling the soil moisture at the base of your tree is always the best way to determine watering needs.

Avoid letting water splash on the leaves of your tree, if possible. The best time of day to water is between 4-8 a.m. After the initial establishment, trees should be watered once or twice a month for the first 1-2 years, even during the winter, if/when weather permits, and especially during summer.

We don’t recommend relying on a lawn irrigation system to adequately water your trees. While the in-ground sprinklers will reduce water needs, trees will still need supplemental watering from a hose.

Weeks Since Planted             Frequency/Durationusing a Hose

1-2                                              Once daily @ 20-30 seconds/tree

3-6                                              3x/Week @ 20-30 seconds/tree

7-8                                              1x/Week @ 30-60 seconds/tree*

Increase frequencies of watering to daily to compensate for additional water loss from temperatures above 85*F. Decrease frequencies of watering to compensate for lack of water loss during temperatures below 45*F.

Read more...

Adding a tree into your Landscape

Click Here To Download Adding a tree into your Landscape

3 Considerations When Adding a Tree to Your Landscape

1.)How Trees Are Measured and Sold

Trees are typically measured for sale using 3 different methods: “Pot/Container size” (in gallons), “Height” (in feet; or in inches for small trees), and “Caliber” (in inches). Caliber is the diameter of the tree trunk, measured at about 6 inches off the ground. Sometimes trees are also measured using the Diameter at Breast Height (also known as “DBH”), but typically DBH is used for tree analysis purposes.

Trees are often sold in ball and burlap form or “B&B”. B&B trees can be measured using height or caliper. Trees are also sold in containers or pots which can be “container-grown” or “containerized.” Usually trees in containers are measured by the number of gallons their potholds. However, it is also perfectly normal for tree farms or nurseries to measure their trees in containers using caliper or height.

The industry standard for most trees would be 6 feet tall, 1-1.5” caliber, or a 15-gallon container. Rarely is anything easy to compare when dealing with plants. Actual sizes, heights, and caliberscan significantly vary based on species, grower, supply/demand, recent weather events, and many more factors.

2.)The Best Time to Plant Trees in Missouri

The best time to plant trees in Missouri is usually October through March. That said, most trees in our area can be planted all year long. Summer planting can create more difficulty establishing the roots of the tree, but proper watering is all it takes to keep trees alive.

3.)Placement & Space Requirements

Some trees grow different heights and widths based on the region in which they are located. It is important to know the mature size of your trees. Certain trees should not be planted nearoverhead power lines, concrete driveways/sidewalks, or the house’s foundation. On the other hand, some trees are small enough to grow under power lines, near concrete, and next to a house.

Locating trees in a spot with adequate space relative to their growth habit is essential to long-term health and wellness. Too much competition can prevent a tree from acquiring appropriate amounts of nutrients, water, and oxygen due to restricted areas for root growth and nutrientuptake. This lack of space leads to extra stress on the plant. Plant stressors can facilitate insect infestation and disease development. Adequate space and airflow make a significant difference in the quality of life for a tree.

Putting plants too close together also limits airflow. The lack of air movement prevents foliage and roots from drying out, which increases the plants susceptibility to fungal diseases

Read more...
Fall Is the Best Time for Landscape Replacement Springfield MO

Fall Is the Best Time for Landscape Replacement Springfield MO

Garden centers have us tricked, and we let them trick us. After a long winter of reading magazines full of tantalizing plants and flowers, we itch for the first warm day. Nurseries make most of their annual income in the Spring, which almost everyone considers to be the best time to replace their landscaping.

But it isn’t. Fall is the best time to plant grass and shrubs and it’s time we realized this. Not only is cooler weather easier on new plants, but planting with rain on the horizon also has advantages. Here’s more on why planting in the Fall can make your yard more robust than we imagined.

Plants love Fall weather. Their leaves aren’t stressed by scorching sun, and cooler temps lessen the demand for water from the roots. Many experts think that fall-dug plants are more robust than spring- or summer-dug plants.

Less watering means lower maintenance. If you plant in spring or summer, more often than not you have to dutifully keep up with watering during those first few weeks or months. Constant observation of your new landscaping gets tedious as the heat ramps ups.

It’s easier on the trees once their leaves are gone. There’s less pressure to devote resources to keeping them alive, and all of their effort is dedicated to growing roots. That’s the benefit of Fall digging for all plants. You’re helping them concentrate on roots, so when they come back in the Spring, they’re ready to put on more top growth in the form of lovely foliage and stunning blooms. If you plant in Spring or Summer, you have to wait an entire year to see those results.

It’s also easier to see where you need to add plants. You should leave your plants up for winter to help the landscaping insulate itself, capture moisture and protect overwintering pollinators, but it also will help you see where the gaps between plants are. Maybe a grass is needed in an open spot, or you realize you want some spring blooms to pop in one bed. Now’s the time to make those changes while the mosquitoes and leaves are gone. You can actually see the ground and get to it through the skeletons of the year’s growth.

So when you’re ready to plant new grass and shrubs, don’t wait until Spring. Call Gabris Landscaping in the Fall to schedule your next landscape replacement project.

Read more...
Types of Landscape Mulch Installation Springfield MO

Types of Landscape Mulch Installation Springfield MO

Landscape mulch installation is the act of placing a protective barrier of mulch around your plants and over your bare soil. Mulch is used as soil covering for several reasons:

  • Preserve water and retain moisture
  • Trapping heat
  • Weed prevention and control
  • Help control soil erosion

There are many types of landscape mulch installation. It can be made up of a variety of decomposing organic materials, including bark or wood chips, or non-decomposing non-organic materials such as recycled tires, pebbles, and landscape fabric.

Pebble Mulch

Pebble mulch/gravel is best used for pathways or driveways. It allows water to drain through, which cement and asphalt do not do. Gravel and pebble mulch also absorb some heat from the sun during the day, and give it off at night, creating a mini micro-climate.

Rock Mulch

Rock landscape mulch can be used in perennial flower beds or other perennial plantings. Large rocks absorb heat from the sun during the day, creating the potential for larger warm micro-climate areas than small pebbles. Dark stones and rocks will absorb more heat than white or light-colored stones. Larger stones and rocks also cover more area with fewer stones. A good covering of larger stones will also help prevent soil erosion.

Pumice Rock

Pumice rock is a type of landscape mulch made from very lightweight porous rock. Its porous characteristic allows it to trap and retain moisture. No other rock mulches are able to retain moisture. It will also absorb some heat from the sun, but not as much as other rock mulches.

Landscape Fabric

Landscape fabric is a black fabric usually made from woven polypropylene. Using a black, landscape fabric catches the heat of the sun, warming up the soil beneath it sooner than usual. This keeps the soil a little warmer at night, making it possible to plant out heat-loving crops a little sooner than you otherwise would be able to.

Each type of mulch has its differing characteristics and uses. When deciding on the types of landscape mulch installation, it is best to talk to an experienced professional about your options.

Read more...
Benefits of Landscape Mulch Installation Springfield MO

Benefits of Landscape Mulch Installation Springfield MO

Mulching is one of the best things you can do for your landscaping. This is the act of placing a protective barrier of mulch around your plants and over your bare soil. This protective barrier can be made up of a variety of decomposing organic materials, including bark or wood chips, pine needles and straw, or non decomposing, non-organic materials such as recycled tires, pebbles, and river rock.

Here are the top benefits of installing mulch in your landscaping:

Controls Weeds

Through the use of landscape mulch installation we can limit the amount of weeds that spring up in the open spaces of your landscaping. The mulch acts as a barrier, limiting the amount of sunlight that can find its way to the weeds.

Retains Moisture

Organic mulches absorb water. Organic and non-organic varieties both cover the soil and limit evaporation. Retaining moisture, especially during hot, dry seasons can not only help out your plants, but it can also help out your water bill.

Prevents Soil Erosion

Mulching not only keeps existing water trapped in the soil, it also keeps rain water from washing away your soil. It does this by breaking the fall of the water and therefore lessening the force when the water impacts the ground.

Maintains Soil Nutrients

Not only does mulch keep soil nutrients from being washed away with the rain, but it also can release nutrients into the soil if you are using an organic material. This happens as the organic material slowly decomposes on top of the soil.

Controls Pests

Using certain types of mulch, such as cedar bark, can deter certain pests due to the fact that the cedar bark has natural oils that act as insect repellant. To reap the full benefits, we recommend using a mulch that is very fragrant, as it will have the greatest affect on insects. But be warned, that some mulches can actually encourage insects to flock to your landscaping and sometimes your house, so we will make sure to recommend which type of mulch will best suit your needs based on appearance and pest control properties.

Polishes up your Landscaping

Mulch can give your landscaping a finished look by filling in the empty spaces while being one of the easiest fillers to maintain. Grass, groundcovers and other fillers may take extensive care, such as mowing and watering, as well as competing for resources with your landscaping plants. Mulch is easy to care for and never competes with your other plants.

If you’re interested in learning more about the benefits of landscape mulch installation, please give the experts at Gabris Landscaping a call so we can schedule a time to visit your yard and recommend what would be best for your landscaping.

Read more...
Crape Myrtle - Tree Service Company Springfield MO

Four Colorful Trees To Grow Curb Appeal – Tree Service Company Springfield MO

If you want to add some color to your lawn and increase the curb appeal of your home, you have more options than just flowers and shrubs. Colorful trees can turn your lawn from dull to vibrant all year around. There are numerous options to choose from, but we’ve listed some of our favorites to help you get you started.
Crape Myrtle - Tree Service Company Springfield MO

Crape Myrtle

The Crape Myrtle average height is between 15 to 25 ft and the average spread is between 6 to 15 ft.

We like like these trees because they’re survivors that laugh in the face of drought and deer. They love hot, sunny climates and bloom in summer when most trees have ended their show. However, crape myrtles don’t love to be topped off. Be sure to give them plenty of room to grow and ask your tree service company to use a lighter pruning touch.
Sugar Maple - Tree Service Company Springfield MO

Sugar Maple

The Sugar Maple average height is between 60 and 75 ft and the average spread is 40 to 50 ft.

We like the Sugar Maple because it’s not picky about soil and doesn’t mind wide ranges of temperature. The hardy sugar maple can be a good replacement tree for an ash or elm tree taken by disease. And added bonus is the eye-popping fall foliage, and you can even tap the sap and make your own syrup. Just don’t plant them too close to roads, because any salt from ice melters will harm the tree.
smoke-tree-tree-company-springfield-mo

Smoke Tree

The Smoke Tree average height is between 10 and 15 ft and the average spread is 12 ft.

We recommend the smoke tree because it plays well with others in groupings, hedges, or windbreaks. Smoke trees like hot, dry weather and thrive in a wide range of soils. They have fascinating textures and add a punch of color in small spaces. In summer, they sport wispy, pink bloom clusters. In fall, their foliage turns yellow, orange, and red. The rest of the year their leaves are purple, gold, or green.
saucer-magnolia-tree-service-company-springfield-mo

Saucer Magnolia

The Saucer Magnolia average height is between 20 to 30 ft and the average spread is 25 ft.

This harbinger of spring is a very tolerant tree, not bothered much by dry, wet, and polluted environments. It does well in our clay soil here in Missouri, but would prefer rich, well-draining loams. Its fragrant white and purple flowers usually show up in March, putting on a spectacular, albeit short, show.

If you’d like us to plant these or any other colorful trees to improve the curb appeal of your home, please don’t hesitate to contact our office. We would be happy to help you explore your other options when it comes to colorful trees for your landscaping.

Read more...
CALL US TODAY!
Call Now